Stencil maps
This tutorial will show how to make a "label" on a surface covered
with a different texture.
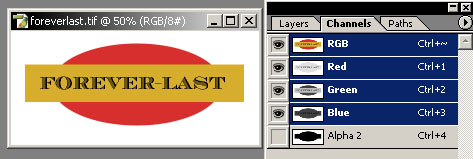
(1) create an image with an alpha channel in PHOTOSHOP and
save in a format that supports it (in this example, a TIF file).
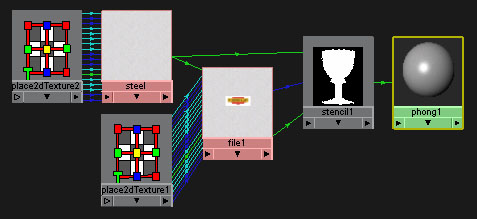
In the Hypergraph, create a new material. Since there will be specular highlights on the surface, choose a Phong.
(2) create a Stencil utility from the menu, "Create > General Utilities > Stencil".
(3) create a new File node from "Create > 2D Textures" menu. Using
the attribute editor, select the image file you made for the label.
(4) With the middle mouse button (MMB), drag the File node on to the Stencil node and you will get a pop-up selection of inputs.
(5) Select "image" as the input.
(6) Next, use the MMB to again drag the File node on to the Stencil node, this
time selecting "Other..."
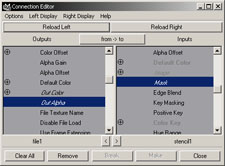
This will open the connection editor window, where you can connect the OutAlpha
to the Mask input.
Another way to do this is to use the LMB on the little arrows at the bottom
of each node icon, where you can pick which outputs to connect to which inputs.
The graph should now look like this, with two connections from the File node to the Stencil node:
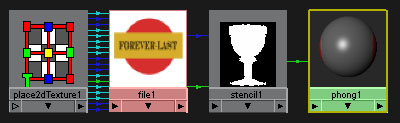
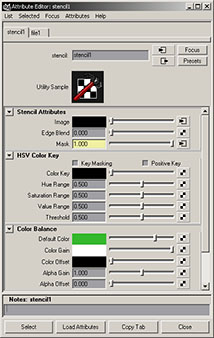
- Looking at the attributes for the Stencil utility, you can see the Image channel has the File node connected, as well as an input to the Mask channel coming from the Alpha output from the File node.
- Another way to use the Stencil utility is with the "HSV Color Key" settings, in which you can "key out" areas of the input image rather than using an alpha channel such as is being used in this example.
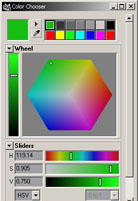
- In the "Color Balance" section, the "Default Color" channel is gray, just like the default gray of the phong shader. This is why it doesn't look much different in the Hypershade view above, but if you change the color to something else (green in the example to the left) you will see the color appear on the phong material node.
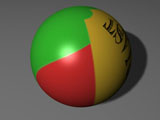
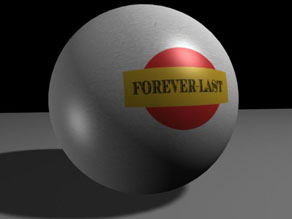
- Apply the phong shader to a sphere in your scene and do a test render to see how the label image's alpha channel allows the Default Color to show through:
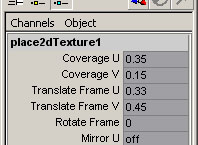
Use the place2dTexture node for the image file to adjust the size and position of the label by changing the Coverage and Translation values on U and V. You can also use the "Rotate Frame" channel to rotate the label 90 degrees on the sphere. In this example the sphere was simply rotated on it's side instead:
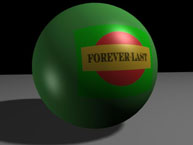
This render shows a problem: The background area around the resized label texture
shows the green color properly, but the remaining surface of the sphere is a
darker shade.
There may be more than one way to fix this, or a setting I am not yet aware
of, but the following step remedies the problem, as well as explaining the reason
for the darker color:
If you want the exact color to appear in both background areas, the easiest
way to sample the color is to store it in the color picker palette area: From
the Default Color in the Stencil attributes, open the color picker and use the
small arrow in the upper section to store the green color into the palette.
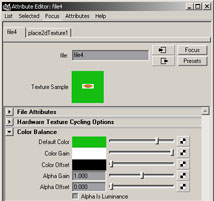
Next, open the attributes for the File node and locate the Default Color channel
in the Color Balance section. Open the color picker again and this time select
the color that you stored in the palette. Now the Default Colors in both background
areas are the same.
Do another test render and the colors should match:

Apparently, the neutral gray of the Default Color for the file node blended with the green Default Color of the Stencil node to make a darker color in the areas that the resized file texture no longer covered. Matching the two colors makes the transition seamless.
Mapping the stencil over a different texture
Create a new file node and simply connect its color outputs to the Default Color inputs on both the Stencil node and it's File node. The new texture has it's own placement node so you can make it repeat on the surface in any way you want.