PROJECT #1
model an interior
description and specs
PROJECT #1
(due week 4)
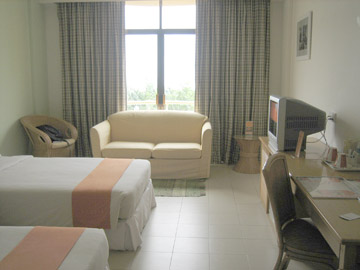
find an image of a simple interior photographed by a professional or known photographer.
Model it using the techniques taught thus far. Pay attention to lighting. Color/texture
is optional. Try to radically change the mood of your image by altering the
light and/or the models. Render this final result and submit with the original
photo.
see samples of past student work of this assignment
other interior related student work (word file)
When to turn in:
On Thursday, in week 4, at the beginning of class, turn in electronic copies of the following in the “JOvelmen” dropbox:
What to turn in:
-the Maya scene file of your interior (.mb or .ma)
-2 (2K) renders of your interior;
-1 will be your direct “3D reproduction” of the photo.
- The second will be the version where you change the lighting or geometry that will warp or change the mood
-also, a copy of the original resource photo.
Further Specification:
Use the Internet, or the Library to search for images (black-and-white or color)
of interiors.
You might start with a preliminary Google search of “photographed interiors”
The idea is to get you active in searching for and using reference material.
Find a CLEAR, medium-large resolution photograph of an interior form a professional
photographer and/or picture book.
Choose an interior that is NOT TOO ORNATE or difficult to reproduce, and is interesting or fascinating to you.
Pay close attention to the “mood” of the interior, furniture, and objects.
DO NOT CHOOSE CLOSE-UP SHOTS of detailed areas or objects.
Choose a photo that represents the WHOLE ROOM (or corner of a room or space)
in one shot.
Color and texture are optional in this project. Yet lighting will be important.
Reproduce the interior in 3D:
Concentrate on representing the shapes, volumes, object, and architectural elements, and try to simulate these features.
DO NOT TRY TO REPRESENT EVERY DETAIL. SIMPLIFY your models, so as to only to feasibly represent the shape. Imagine that you will not need to see any one object close-up. Hence, model as if you will see the whole room from a standing distance, just as in the photograph. Try to use everything you’ve learned with Polygon, and NURBS modeling techniques. You must approve the reference photo that you are using through me before you begin work.
Pay particular attention to how the light looks in the photograph. Where is the illumination coming from? Is daylight coming in from windows? If so, what time of day does it seem to be? (Long shadows indicate early morning or late afternoon.) Or, does all the illumination come from lamps, or incandescent lights. If so, can you see the illuminators, are/or some of the lights of screen?
Now, when you light your scene, dramatically change the mood or the lighting of your own 3D modeled interior. Move the light sources to different locations. Use different types of lights to change the mood or effect. You are also allowed to change, distort, or warp the models if you wish to change, intensify, or warp the mood that is given in the original photo.